Tuesday, July 21, 2015

3D: Torturing the Folger 2020 i3.

There are a few "torture tests" for 3D printers out there on the web: objects that are hard to print and expose the qualities and limitations of your printer. Benchy is one, and Makezine published another set of them. Here is what happened when I tried the Makezine set (and you can read about Benchy at the end). They make the STLs available for seven tests and also publish a scoring scheme. It is supposedly objective, although I am less confident of this than they are, and certainly looking at results from other people, there are examples where one looks better than another but the authors used the same score. The comments on the Makezine article include a link to a spreadsheet comparing 23 printers. I have some doubts about the quality of the data. The columns don't correspond exactly to the tests. There is some information that simply cannot be true, in that the Z resonance test requires printing an object 150mm tall, and printers with a maximum height of less than this are recorded as passing the test.

Regardless of these issues, here are my test results. In each case I've given a picture or two, my best guess at the right score, and how many of the printers in the Makezine result did better, equal and worse than this.

All prints are with PLA at 0.2mm layers, 30% infill, using my standard (moderately slow) speed. I've given the time estimates reported by Slic3r. I didn't note the actual times. My printer is a Folger 2020 i3 with a few minor modifications, none of them affecting the mechanical operation.

Unrelated side note: over the weekend, I partially disassembled the Y bed. It's always made a lot of noise, and I was going to take it all the way back to the bearings and put it back together. In the event, I didn't do this. I just saw some of the bolts holding the bearing mounts could be retightened. In some cases, I had never screwed the nylock nuts flush down into the mounts. It's now much quieter. Now it's the X movement that is getting noisy.

1. Dimensional accuracy

The metric here is the diameter of the second largest disc. It should be 20mm in both X and Y. Mine was 19.9mm in X and 19.8mm in Y, giving it a rating of 3. Makezine has 5 better, 8 equal and 10 worse. 43 minutes.

2. Bridging
I'm surprised how well this and the next test worked. Even the longest bridge, 65mm, shows only slight sagging, and it is (I think) in the perimeters. I rate this as either 3 or 4. Assuming 3, which is worse, there are 9 printers better, 3 the same, and 11 worse in the survey. 59 minutes.

3. Overhang
This one is the really amazing test. It prints overhangs at angles ranges from 30 degrees to the vertical to 70 degrees to the vertical.


The Allen key is to hold the piece up, as it doesn't support its own weight. This seems like a 3, as there are some hanging loops on the 70 degree tile, though it isn't far off a 4. 10 better, 4 the same, 9 worse. Better cooling airflow would probably help this and the previous test. 1 hour 28 minutes.

4. Dimensional accuracy
Here you print a block with pegs in it and see which ones can be removed, to see the finest tolerance in the space between the pegs and the block. My first try failed as a peg came loose while the print was still in progress. This is the second try.

I was only able to get the 0.5 and 0.6 pegs out, with a score of 2. 15 printers are better than this, 4 the same, and 4 worse. The print took 42 minutes. The result is consistent with what I've seen on prints with interior holes - they are always too tight. It can be fixed by a lower extrusion multiplier. Maybe less infill would help too.

5. Fine positive space features
Also known as the pointy print.


The thing to look for in this is the fine strands between the points, which gives it a 3. The spires are well formed and quite regular. The strands are an issue I have with my extruder. According to calibration measurements, it does not over extrude, but it does ooze a little before starting the print, and I often get these strands on fast travel moves. One possibility is that the retraction isn't very good. Replacing the extruder is an improvement I'm likely to make one day.

6. Mechanical resonance in XY

This is a pass fail test. I think this is a pass, like 10 of the 23 printers in the test. It took 37 minutes to print.

7. Mechanical resonance in Z
The test object for this is 150mm tall, and that's beyond the capabilities of my printer (though this awesome mod might make it possible). I get nervous when the Z position is above 110mm: I start to hear clunking noises during Z movement. It's probably due to misalignment of the threaded rods, as this would become more apparent closer to the end of the travel when it becomes more mechanically constrained. I decided to do the test with the object scaled down to 100mm. It passes the test conditions in showing no layer registration or ridging problems. In the reported test, 18 printers passed and 5 failed. The print time was 1 hour 9 minutes.
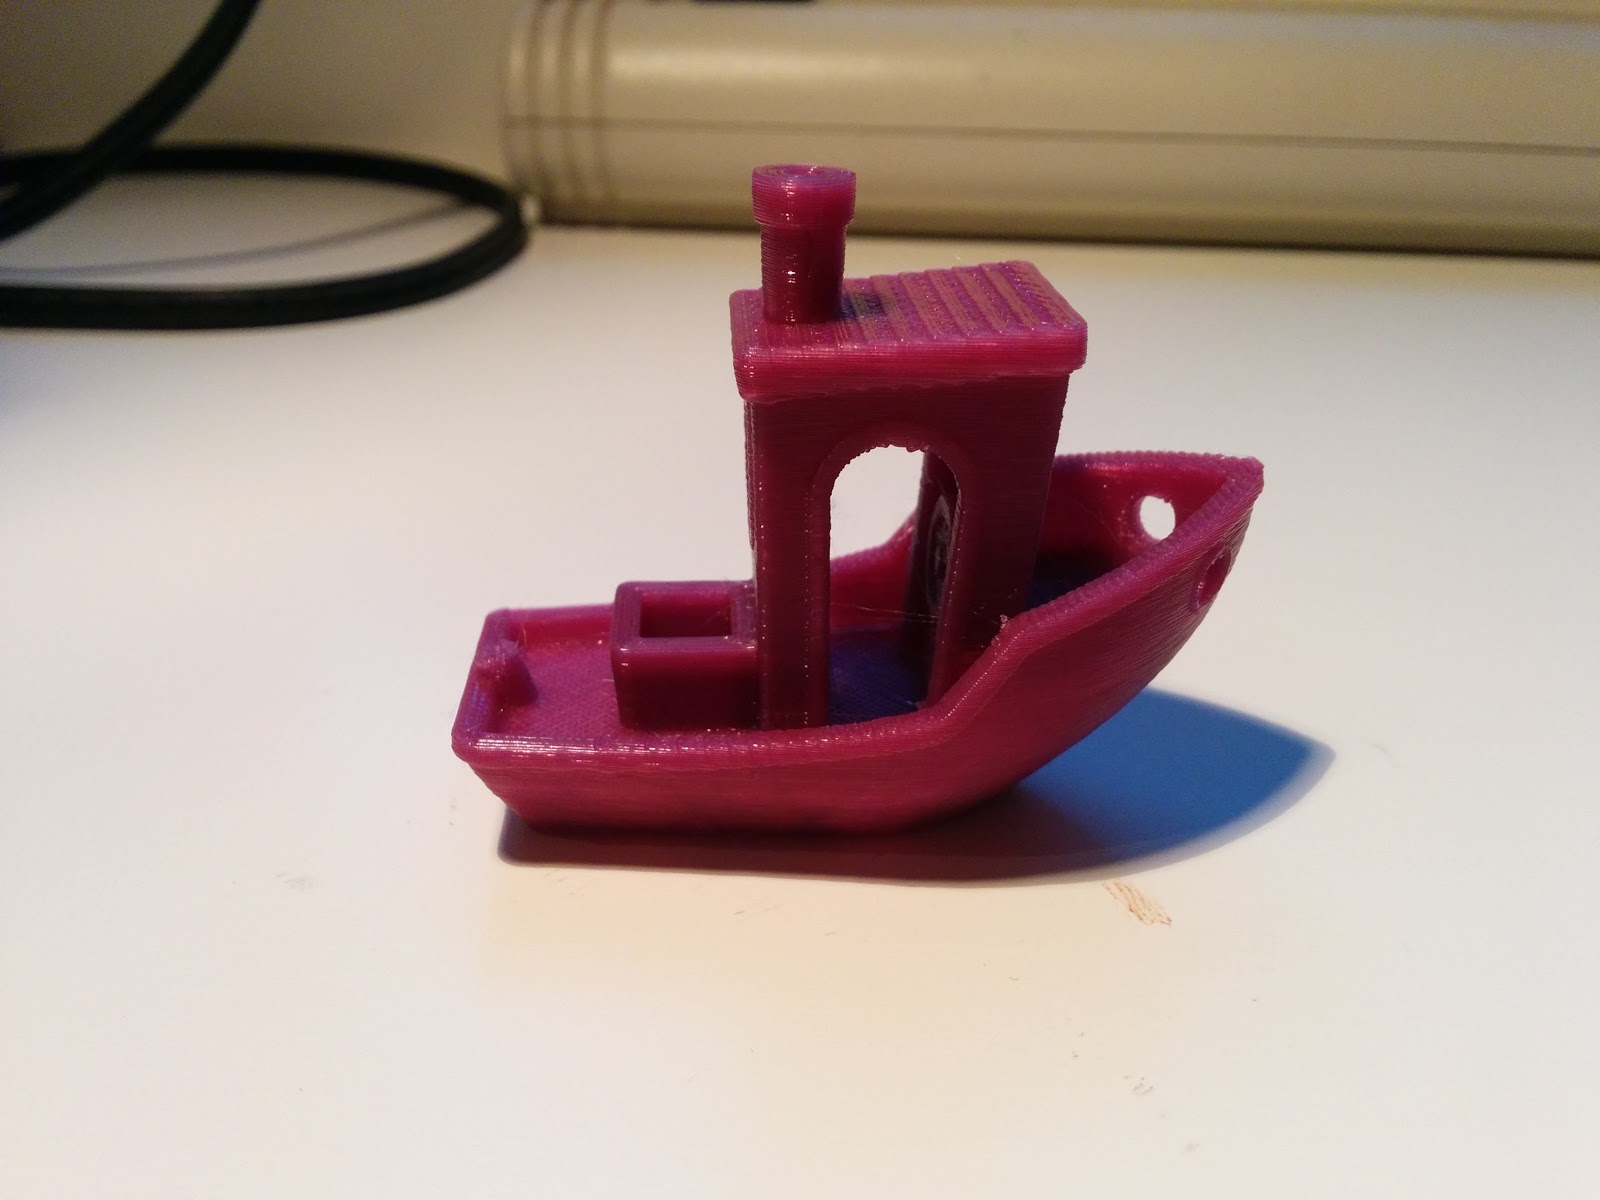
Bonus: Benchy Boat
Benchy is another well known torture test. I did print this once before with fairly good results, but afterwards realized that I was not using the recommended settings, i.e. 0.2mm layers and 10% infill. Here are some pictures from another go with these settings.


I'm really happy with this. There's not even much sagging on the cabin roof, which I did get last time. I won't go through all the analysis listed at http://www.3dbenchy.com/dimensions/. They were all very close except the interior dimensions of some of the round hole. The word 3DBenchy on the stern isn't legible, though you can tell there is something there.

Sunday, July 12, 2015

3D: Some mods, and a rocker switch

I've made a few additions and adjustment to my 3D printer, using parts made on the printer itself.

First, a very trivial change which helped a lot. The Folger kit includes a small plastic loop that attaches to the top of the left hand Z motor to guide the filament. They say attach it to the front outer corner of the motors. Moving it to the back inner corner gives a much straighter path for the filament, and the spool moves more easily as a result. I also printed a small cylinder to act as a spacer between the spool and the frame. If you don't do this, the left hand end of the X carriage rubs against the spool. I haven't seen any evidence of this affecting the prints, but it seems like a bad thing.

I made a mount for the LCD controller which clips to the top of the frame. Here's how it looks:

The model files and another picture are here.

On the extruder, I added a fan shroud which should direct some air to cool the object being printed, using this model. I'm not sure how much difference it makes. I also attached a light as the extruder casts a shadow making it hard to see the details of what is happening. Thingiverse link here, and here is how one version of it looks:
The Thingiverse link describes the electronics. In short, it is three clear LEDs and a 220 ohm resistor, wired to the 12V output of the power supply.

I protected the electronics in a couple of ways. I considered printing a box to put round the electronics. None of the designs I found were quite right, and some didn't print properly, so in the end I made some brackets which can be clipped together into a kind of cage:

Here's the model for this one.

Lastly, I added a cover for the power supply and a power switch:
The cover comes from here, and the power switch box from here. I don't much like this switch cover. It has a single hole for a screw so it's not very solid. I chose it mainly because I had a pack of rocker switches the right size to fit it.

That's all for now. My next project will probably be a rebuild of the Y bed.

Monday, July 06, 2015

3D: Speeding up the Folger

I've written in the past about how the default settings that come with the Folger 2020 are suboptimal and in some cases altogether wrong. One area where I think they can be improved is in the printing speed. Here's some changes I've made. I have only tested them on a simple object, and I've not pushed them as far as they might go for fear of shaking the printer to pieces, overheating the motors, and other scary things. I also only made adjustments to the X and Y values.

According to one of Tom's videos, there are three elements to the speed of the printer:

  • the acceleration. This is said to often be the dominant factor, as it controls how long the printer takes to get up to speed. The Folger config sets this to 1000. Many Prusas uses 3000 or even 9000. I raised it to 3000 in configuration.h, and didn't see any difference.
  • the jerk speed. This tells the printer the maximum instantaneous change in speed it can make before the acceleration parameter has to be considered. I didn't change it.
  • the regular printing speeds. configuration.h has these set to a maximum of 250 mm/s, but the Slic3r configuration sets them a lot lower than this. So these are the values I changed.
My test object is something which is roughly a long thin rectangle about 100mm by 10mm, and I printed it with the long direction along both the X and Y axes. Before making any adjustments, Slic3r estimates it as needing 20 minutes 27 seconds to print. The part of the Slic3r settings to change is Speed, under Print Settings. Folger's values are: perimeter and small perimeter speed 40, infill 50, solid and top solid infill 45, omitting the value I didn't change. I now have them as: perimeter and small perimeter 110, infill 120, solid and top infill 105. The resulting estimated time is 15 minutes 14 second, that is about 75% of the original. In the print about half of layers involve long travel (non-printing) moves without much printing, so it might be even better on other objects.

Thursday, July 02, 2015

3D Printer Project, Part 14: The FolgerTech 2020 Reviewed

Over the last few weeks, I've written a lot about my experiences of buying, building, tuning and using the FolgerTech 2020 3D printer. I'd like now to summarize some of the good and not so good points about this kit. This is not a full review, more like a collection of observations. Up front, I want to say that I think this is a very good kit. I enjoyed putting it together and it gives remarkably good prints. You could of course spend more and get better results, but it is by no means an toy product. You will get a real, working printer out of it.

Some specific good points:
  • the construction is very sturdy. The 2020 aluminium struts are themselves solid and the L brackets that join them together give robust right angle corners without the need for extra bracing. Before I bought the kit, I had some concerns about whether having the Z axis motors at the top or the filament spool on one side would make it unbalanced, and I've not seen any sign of this. I don't have any experience with acrylic framed printers; what I've read and seen on YouTube is that the acrylic is brittle and may warp over team. Acrylic frames were a deal breaker for me when I was deciding what to buy and I was glad to find this kit.
  • the kit was complete. Apart from tools, I had everything I needed. There was one minor error in that the instructions called for one more bolt and nut than the inventory listed. I was able to work round this.
  • the metal parts are cut accurately. All of the 2020 pieces and the chrome rods were the sizes they were supposed to be, to within a millimeter. As I mentioned in my construction diary in previous posts there were only a couple of minor shims and tweaks needed.
  • the printed parts were, in most cases, accurate enough. Everything fitted together the way it should, apart from an issue with the end stops that I'll mention below. Assembling the X carriage took a fair amount of force; this is a good thing, as you want it to be solid.
  • the instructions were pretty good. I never got stuck without an idea of what to do. I know at earlier points in Folger's history people said it was more like they were supplying a kit of parts rather than a kit, and I think this is no longer the case. The same is true of many of the cheap kit vendors. You do have to think for yourself, which for me is fine, as it's part of the point of buying a kit rather than a ready made printer. The weakest points are in the configuration, where some of the information (about Configuration.h) is simply incorrect, as are some of the Slic3r settings.
  • the price. It's about the cheapest RepRap printer kit you can find. The previous points show that they haven't cut corners to make this happen.
  • it an American company. I want to be clear what I mean here. Many people writing on forums and blogs are negative about Chinese vendors. They just assume that Chinese products will be badly made. This has not been my experience of buying things from Chinese vendors (for example via Banggood). The reason I single this point out is that it means fast delivery if you are in the US, and that you can get support from someone in the same timezone and with the same language. It's nice to have that if it turns out you need it. I found Dan from Folger good at replying to my email, and he has also dropped in on the forums at http://forums.reprap.org/ from time to time.
    Edit: I have since heard that Dan has left Folger.
Now a few things that are less good:
  • the ordering process was a bit disorganized. I was given two tracking numbers, one for the printer and one for a spool of filament. The tracking number that was supposed to be for the printer was used for the filament, the one that was supposed to be for the filament was never used, and the printer itself arrived on a third tracking number. Until it arrived, this left me with some doubt about whether the order had even gone through, and I was not able to get Dan to understand this and give me a clear answer.
  • several things show some lack of attention to detail or quality control:
    • as mentioned above, the instructions for configuring the firmware are wrong, and the settings supplied for PLA are wildly out (219C is way too hot). The forums really helped me here, so it turned out OK. Folger should take this information and correct their instructions.
    • one weak spot in the printed parts is the mounts for the end stops. The one I had are such that the level for microswitch on the end stops only just extends beyond the mount. As I described in a previous post, this caused a significant problem for me on the Z axis, resulting in me having to disassemble the X carriage and partly rebuild it. It was fixable, but annoying. No-one else reported this problem, so I may have just got some poor limit switches.
    • the extruder was assembled in a different way to the one assumed by the instructions. Again, this had an easy fix (reversing the extruder motor connection), but it took me a day or two to figure out that this is what was going on.
    • the RAMPS board was so badly made that I didn't want to use it. The soldering quality was awful (again, see an earlier post on this). Dan says they have since switched suppliers, and to his credit, he did offer me a replacement, though in the interests of instant gratification, I had already ordered one from Amazon.
So there we are. If you have any comments on your own experiences with this kit, please add them in the comments, or drop in at the reprap forums (here).