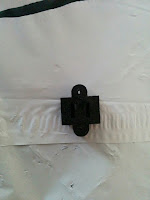
Step 3 (base frame); about 45 minutes. This was all pretty simple. I used a square to help align the corners, though it's not really needed.
Step 4 (Y carriage); about 20 minutes. I was unable to get the SK8s to hold onto the chrome rods at first. They just slid through them, no matter how tight I made them. I stuck a small piece of tape round the end of each rod, and this shimmed them out enough. I used some spare Kapton tape from the kit. The bearings feel a bit rough or graunchy when they move on the chrome rods, though this eases up a little after sliding them back and forth a few times.
Step 5 (upper frame); 15 mins, or an hour if you allow for the time for me to go out to Home Depot and buy a M3 hex key. No problems.
Step 6 (heat bed); probably 90 minutes. In case you need help identifying the printed parts, it's these ones:
The M3 bolts didn't go through the printed fittings very well at first. I found it helpful to screw the bolts through them first without attaching them to the bed, in order to clear out the bolt hole in the fitting. On my first attempt at assembling the bed on the bearings, it didn't move very smoothly. It wasn't that it didn't move at all, it just had a very rough feel. At this point I had to take it apart, as I had the cable ties the wrong way round, that is the smooth side was against the "ratchet" in the ties. On the first attempt I had screwed the nylock nuts down very hard. On the second try, I didn't do this and found the bed moved a bit more smoothly. The nuts aren't actually loose, of course, just not as tight as they had been. I positioned the the chrome rods by marking the center of the beams, and then measuring 70mm in each direction from the center. Slight changes in the position of the chrome rods also helps the smoothness.
Here is an underside view, before snipping the ends off the cable ties:
And here is a video which may give an idea of what the bed movement feels and sounds like:
That's all for now. More as the week goes on.
[1] As well as some metric Allen keys I bought for this project, I have an old set in British BA sizes which are close enough for most things. The only thing I couldn't find an equivalent for was M3. Incidentally, the set I have belonged to my grandfather who, by coincidence, was called Allen.


No comments:
Post a Comment