First a general overview:


I bought almost all of the part from Eclips3D or from the links in the standard bill of materials. The black plastic parts are from the kit. The red, blue, orange and white ones are replacements or additions. I can't quite bring myself to cut the belts to the exact length, so they are tied up to the cooling fan.
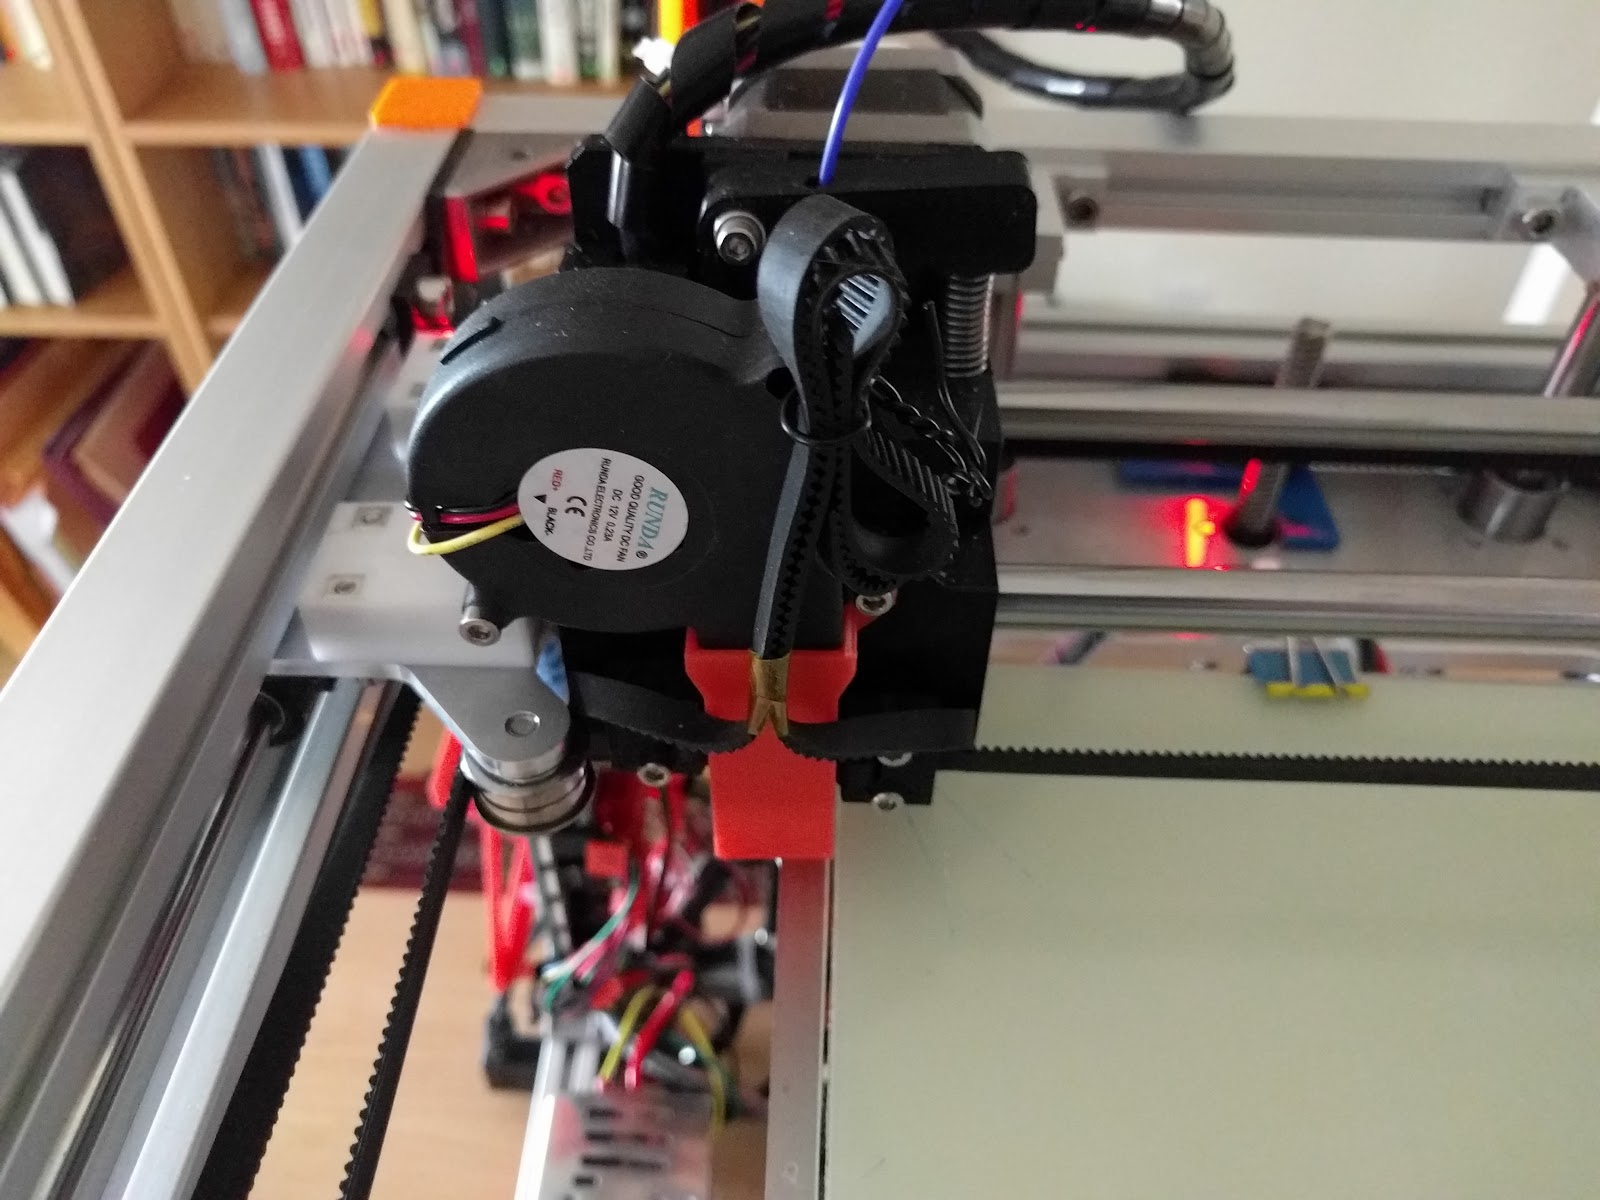
On the subject of belts, I was worried at how close the belts came to the flanged bearings in the front corner, and so I changed the innermost ones on each side to F605zz bearings instead of F625zz. They are 2mm smaller in diameter, and this created a little extra clearance. You can't really see the difference, but here's a picture anyway:

Around the back of the extruder, it looks like this:

You might just about be able to see that the E3D hotend has a screw-in thermistor instead of the fiddly standard one. I hear that E3D are about to make something like this standard. The cable support is from an entry on Thingiverse by Theo1001. My wiring is not nearly as nice as his; I've never been much good at making projects look pretty. I found early on that the cable bundle would sometimes flop down in front of the X end switch with bad consequences. This lifts it a little out of the way. The hot end is wrapped with ceramic tape in what Tom Sanladerer would call a Kapton burrito. See a previous posting for details.
The rods for the X carriage are mounted in a variant of the original design, again from Thingiverse. Some of the bolts are 18mm instead of the original 16mm ones, as 16mm is only just long enough. Once I changed to these, the X movement went from a bit grindy to being a lot quieter. They are printed in PETG. All the other printed parts are PLA.

I capped the top and bottom of the uprights: the bottom so it didn't damage my desk, and the top to clean up the appearance.


The one at the back left also has a filament guide. These are my own design.

And here is the spool holder. It supports a full 1kg roll of filament fine.

The print bed is a piece of 3mm mirror glass with PrintBite. I've only just fitted the PrintBite, and so far I am very impressed with its ability to grab the first layer when its hot and release it cleanly when it cools down. Around the back of the bed, I have a height adjuster by cporto. He has a newer and better version.


Turning to the electronics, I have the power supply mounted to the lower frame with a couple of brackets I knocked up, and a separate power switch for the LED strip next to the mains switch.

I originally used a RAMPS+Arduino combo, since the recommended Azteeg board was out of stock. I recently switched over the the Azteeg, using a mount that I designed.

If you have sharp eyes, you can also see a reinforcement on the SD card socket, as it was a bit flimsy and came loose from the board. The board is the Azteeg X5 mini version 3 with the new SD5984 1/32 stepper drivers. After the RAMPS, it is incredibly smooth. The drivers get very hot, even after tuning down the current. And they are pretty.

I had difficulty getting my Windows desktop to talk to the board over USB, so in the end I connected the USB to a Raspberry Pi running Repetier Server. I mostly use the Ethernet connection for uploading new configs via the Smoothieware web interface. I have both the cooling and E3D fans attached to the board, meaning I can turn the annoying E3D fan off when I am not printing. The config for this version of the Azteeg X5 is slightly different from the previous version, with the E3D fan attached to port 0.26.
There is still more tuning to do, but so far the speed and print quality are great. I've reliably printed with layer sizes down to 0.05mm. I might in future change over to the Titan extruder. For now, I'm happy.
5 comments:
Great work Animoose! Looks amazing! I need to work on tidying up my wiring, mine looks like a rat nest LOL no where near as tidy as yours.
Cheers~
Rock
Thanks for the tour! I've been waiting to see how this one turned out for you. Did you do any comparison of the Eclips3D to the coreXY that FolgerTech sells? I have the FT Prusa 2020 kit and it was very convenient, although some upgrades did improve it quite a bit. I wasn't sure if their coreXY kit would need similar upgrades. Its probably easier to incorporate upgrades directly into an Eclips3D build.
Are the X and Y linear bearings noisy on the rods? That was my main complaint with the FT prusa kit.
+Geoffrey Forest, thanks for your comments. I haven't seen the new Folger printer apart from the pictures on the web site. As I understand it, it is not a coreXY design according to the design pattern at http://corexy.com. However, it does look like they have taken the lessons about building a really rigid frame seriously (as they did with 2020), and that might be the most important thing.
The Eclips3d uses bronzed bushings rather than linear bearings. At first I got quite a lot of noise. This turned out to be that the two X-carriage rods were not exactly parallel. Fortunately, the design makes it possible to fine tune them, and since then it has been quieter most of the time. Just some diagonal moves at certain speeds and small Z positions are noisy, so I think there is a something that is generating noise and then the Z bed acts like a sounding board. I don't know for sure this is the case, and I think with a little more tweaking I can improve it further.
It didn't even occur to me that the FT printer didn't follow the coreXY principle. I found a video that highlights some of the features. Turns out the X motor rides on the X gantry, and there are two Y motors to move the X gantry back and forth. And there are two Z motors to move the bed. Seems straightforward, but the coreXY movement is just elegant.
Thanks for your feedback, I'll be following your adventures with this machine. I've upgraded the X and Y linear movements on my FT Prusa 2020 with the v-slot rollers on OpenBuilds using Sonny Lowe's designs. MUCH more quiet and smooth operation. But of course I'm starting to think bigger, looking at the larger scale printers.
Best of luck!
Post a Comment